Your first page from a product URL
From an address to a page in your shop, in five steps.
This is the shortest whole path through the product. You give it the address of a product, it writes a page about that product, you read it, you change what you want changed, and you put it in your shop. Everything else in this documentation is a detail of one of those five steps.
Before you start you need two things: an invitation you have already accepted, and a product page somewhere on the web that the system can read. Your own shop is the usual one.
1. Open the Page builder
In the rail on the left, Page builder. It opens on the Build tab, which asks "What are you creating?"
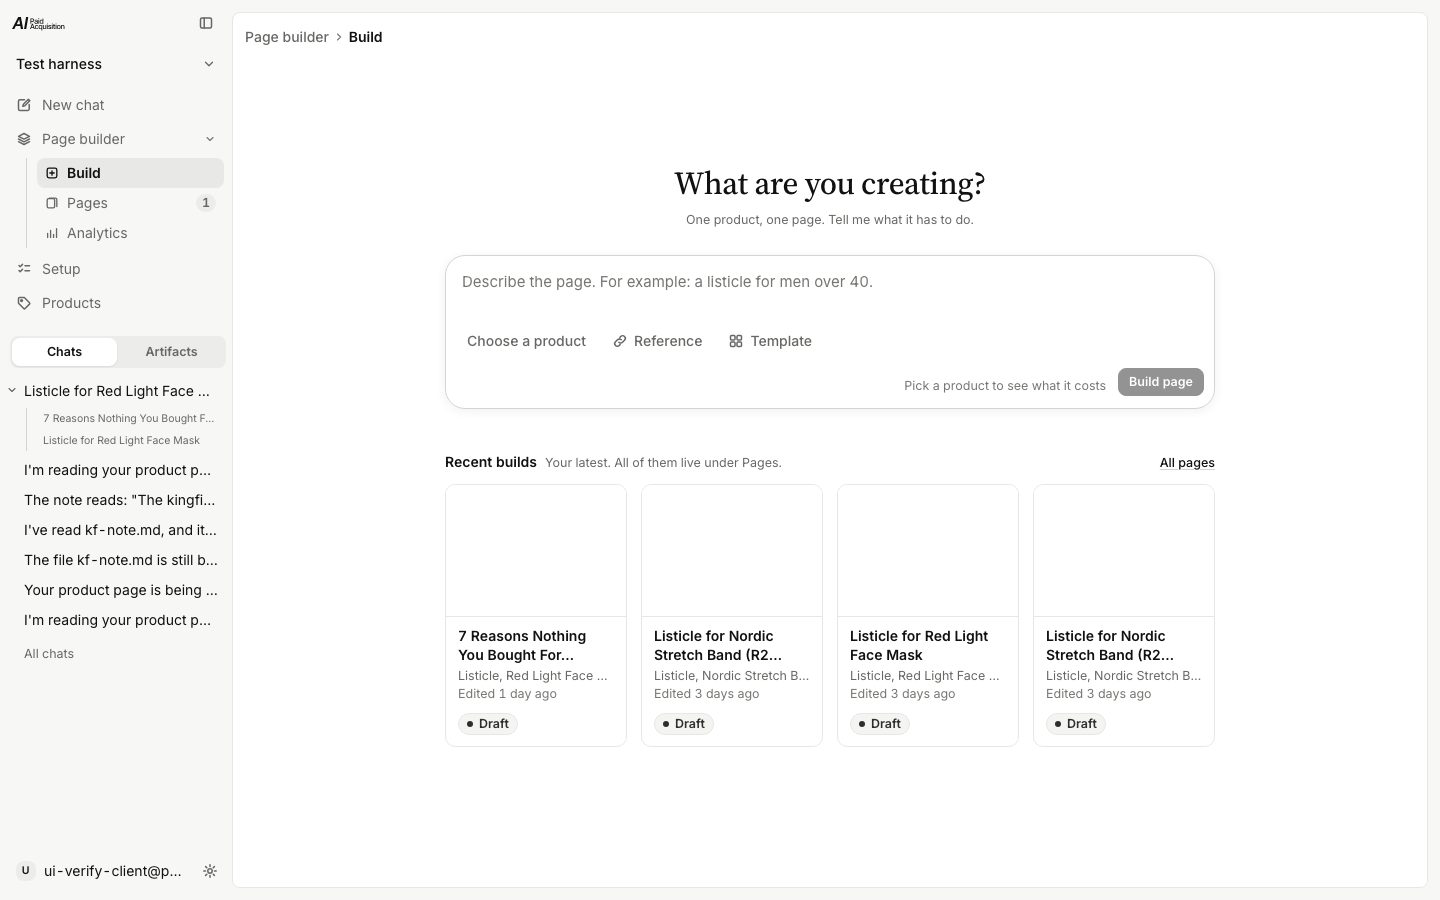
2. Say what the page has to do
Write it in the box, in your own words. "A listicle for men over 40" is enough. The box tells you the same thing: "Describe the page. For example: a listicle for men over 40."
3. Choose the product
Under the box, Choose a product. If the product is not there yet, open Products in the rail and use New product from a URL: the system reads the name, the price, the picture and what the page claims, and the product is then in this list for good.
Two more entries sit beside it. Template decides the shape of the page and stands on Auto until you change it, and Auto always names what it resolved to. Reference points at a page you like. Both have their own page in this documentation and neither is needed for your first one.
4. Press Build page
The foot of the box now says what the press costs and how long it takes. Press Build page.
The build opens the editor by itself when it is done. Nothing else has to be watched, and closing the tab does not stop it. A build takes a few minutes.
5. Read it, change it, publish it
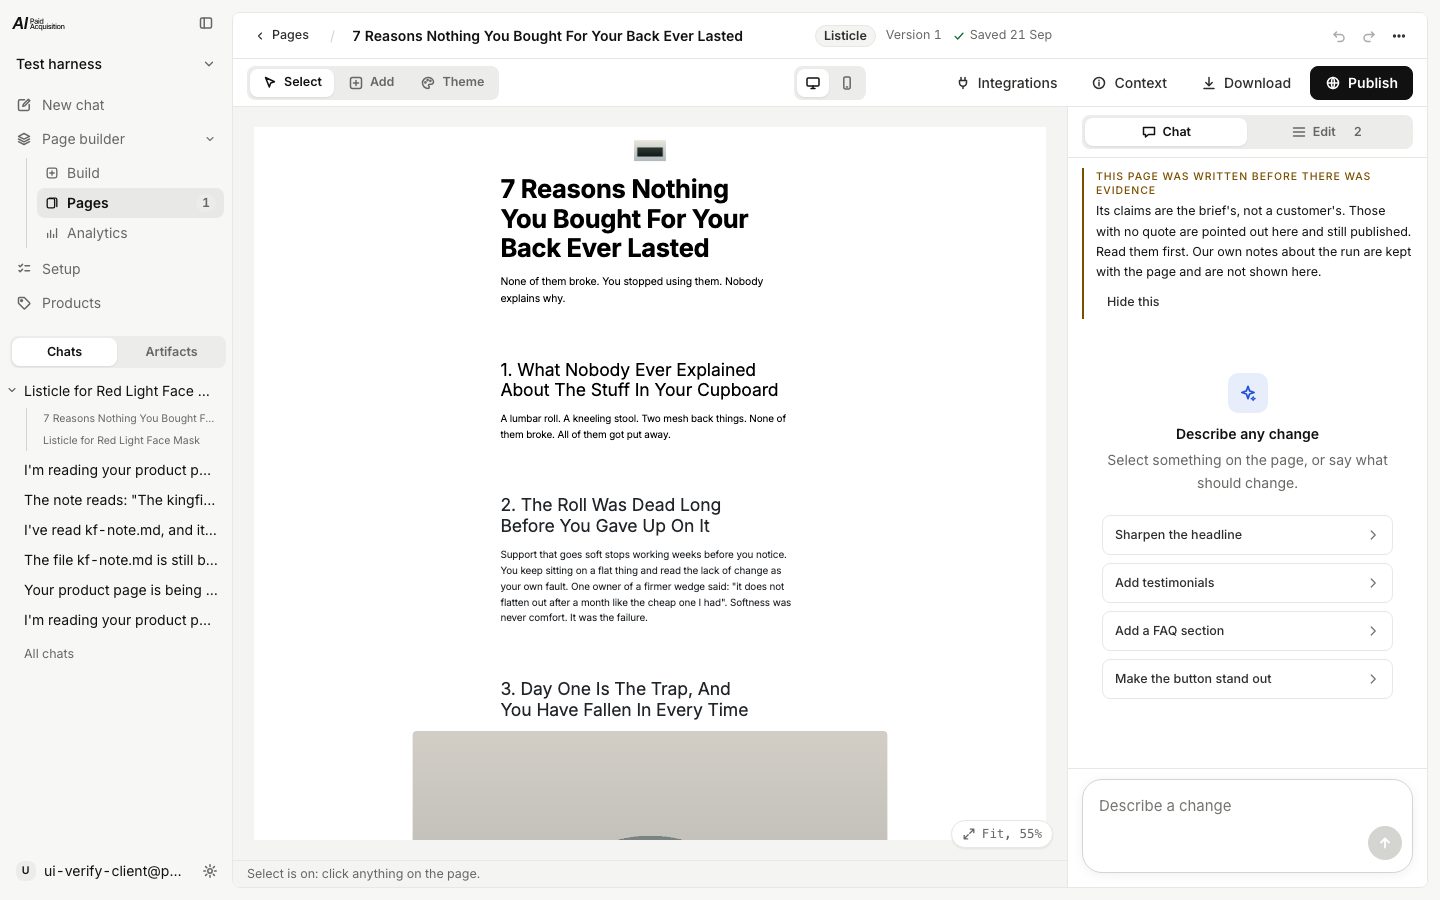
The page is on the left, the panel is on the right. Read it top to bottom before you change anything. Then either mark a piece of the page and say what should change, or write the change into the panel's box, which says "Select something on the page, or say what should change."
When it is right, Publish. With a Shopify store connected the page goes into that store. Without one, it still has an address of its own that anybody can open.
What to read next
Updated 2026-09-23